Step 2
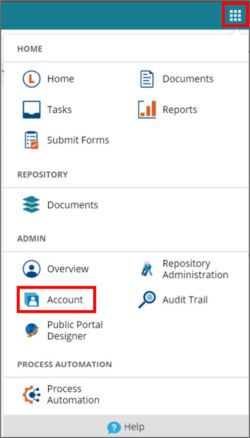
Click the navigation button (9 small squares) in the top right corner, then click Account.

Step 3
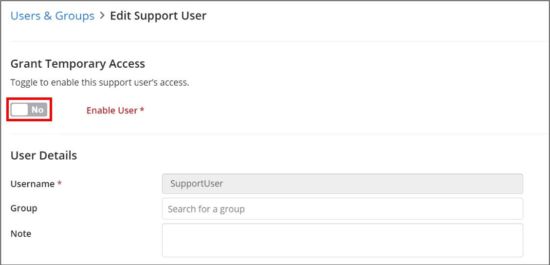
From the Account section, find the grayed-out account named SupportUser and select it. Be sure to select the SupportUser, not the Support account.

Step 4
Click the greyed-out switch entitled Grant Temporary Access to enable the user.

Step 5
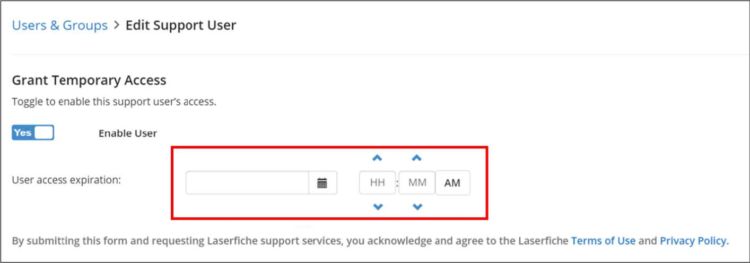
After granting temporary access, set a date when you want the Support User to expire. We recommend setting the expiration date for 3-4 weeks out to avoid having to re-authorize access too often.

a. If the Password fields are not automatically pre-filled, please input a password for the Support User and send the password to AIS Support.

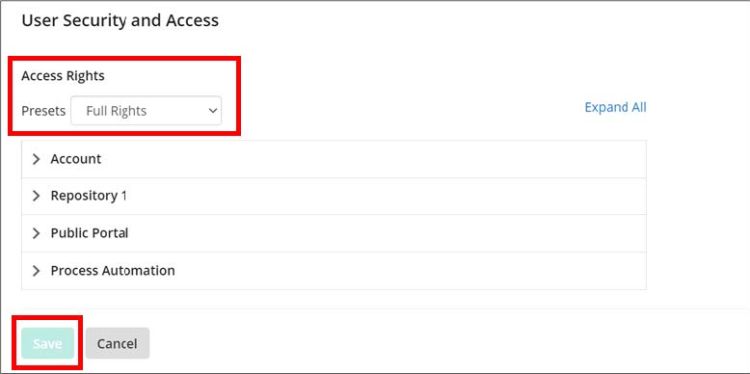
b. If the Presets were not already pre-filled, set the Presets under the Access Rights to Full Rights and hit Save

Step 6
Once you have completed these steps, or if you encounter any issues, please email AIS Support.

